
My 1Password SSH Agent Setup for OCI
Managing SSH keys for cloud infrastructure can quickly become a security and organizational challenge. Since I work at Oracle, naturally I use Oracle Cloud Infrastructure (OCI). And, as with any cloud, securely accessing compute instances while maintaining good key hygiene is essential. Here’s how I leverage 1Password’s SSH Agent to create a more secure, convenient workflow for connecting to my OCI compute instances.
Why 1Password SSH Agent for OCI?
1Password’s SSH Agent offers several advantages over traditional key management approaches:
- Centralized Key Management: Store all your SSH keys in your 1Password vault with the same strong encryption that protects your other credentials
- No Local Key Storage: Keys remain protected in your 1Password vault rather than residing as files on your local system
- Seamless Authentication: Connect to your OCI instances without manual key handling or passphrase entry
- Enhanced Security: Leverage 1Password’s security model to protect your cloud infrastructure access
If you’re new to 1Password, or uncertain of what I’m talking about - no worries I’ve got you covered. I’ll walk through the entire process of setting up 1Password’s SSH Agent and configuring it for use with OCI compute instances. We’ll cover everything from initial setup to actually connecting to your remote hosts, including how to properly configure your public key when creating new compute instances in OCI.
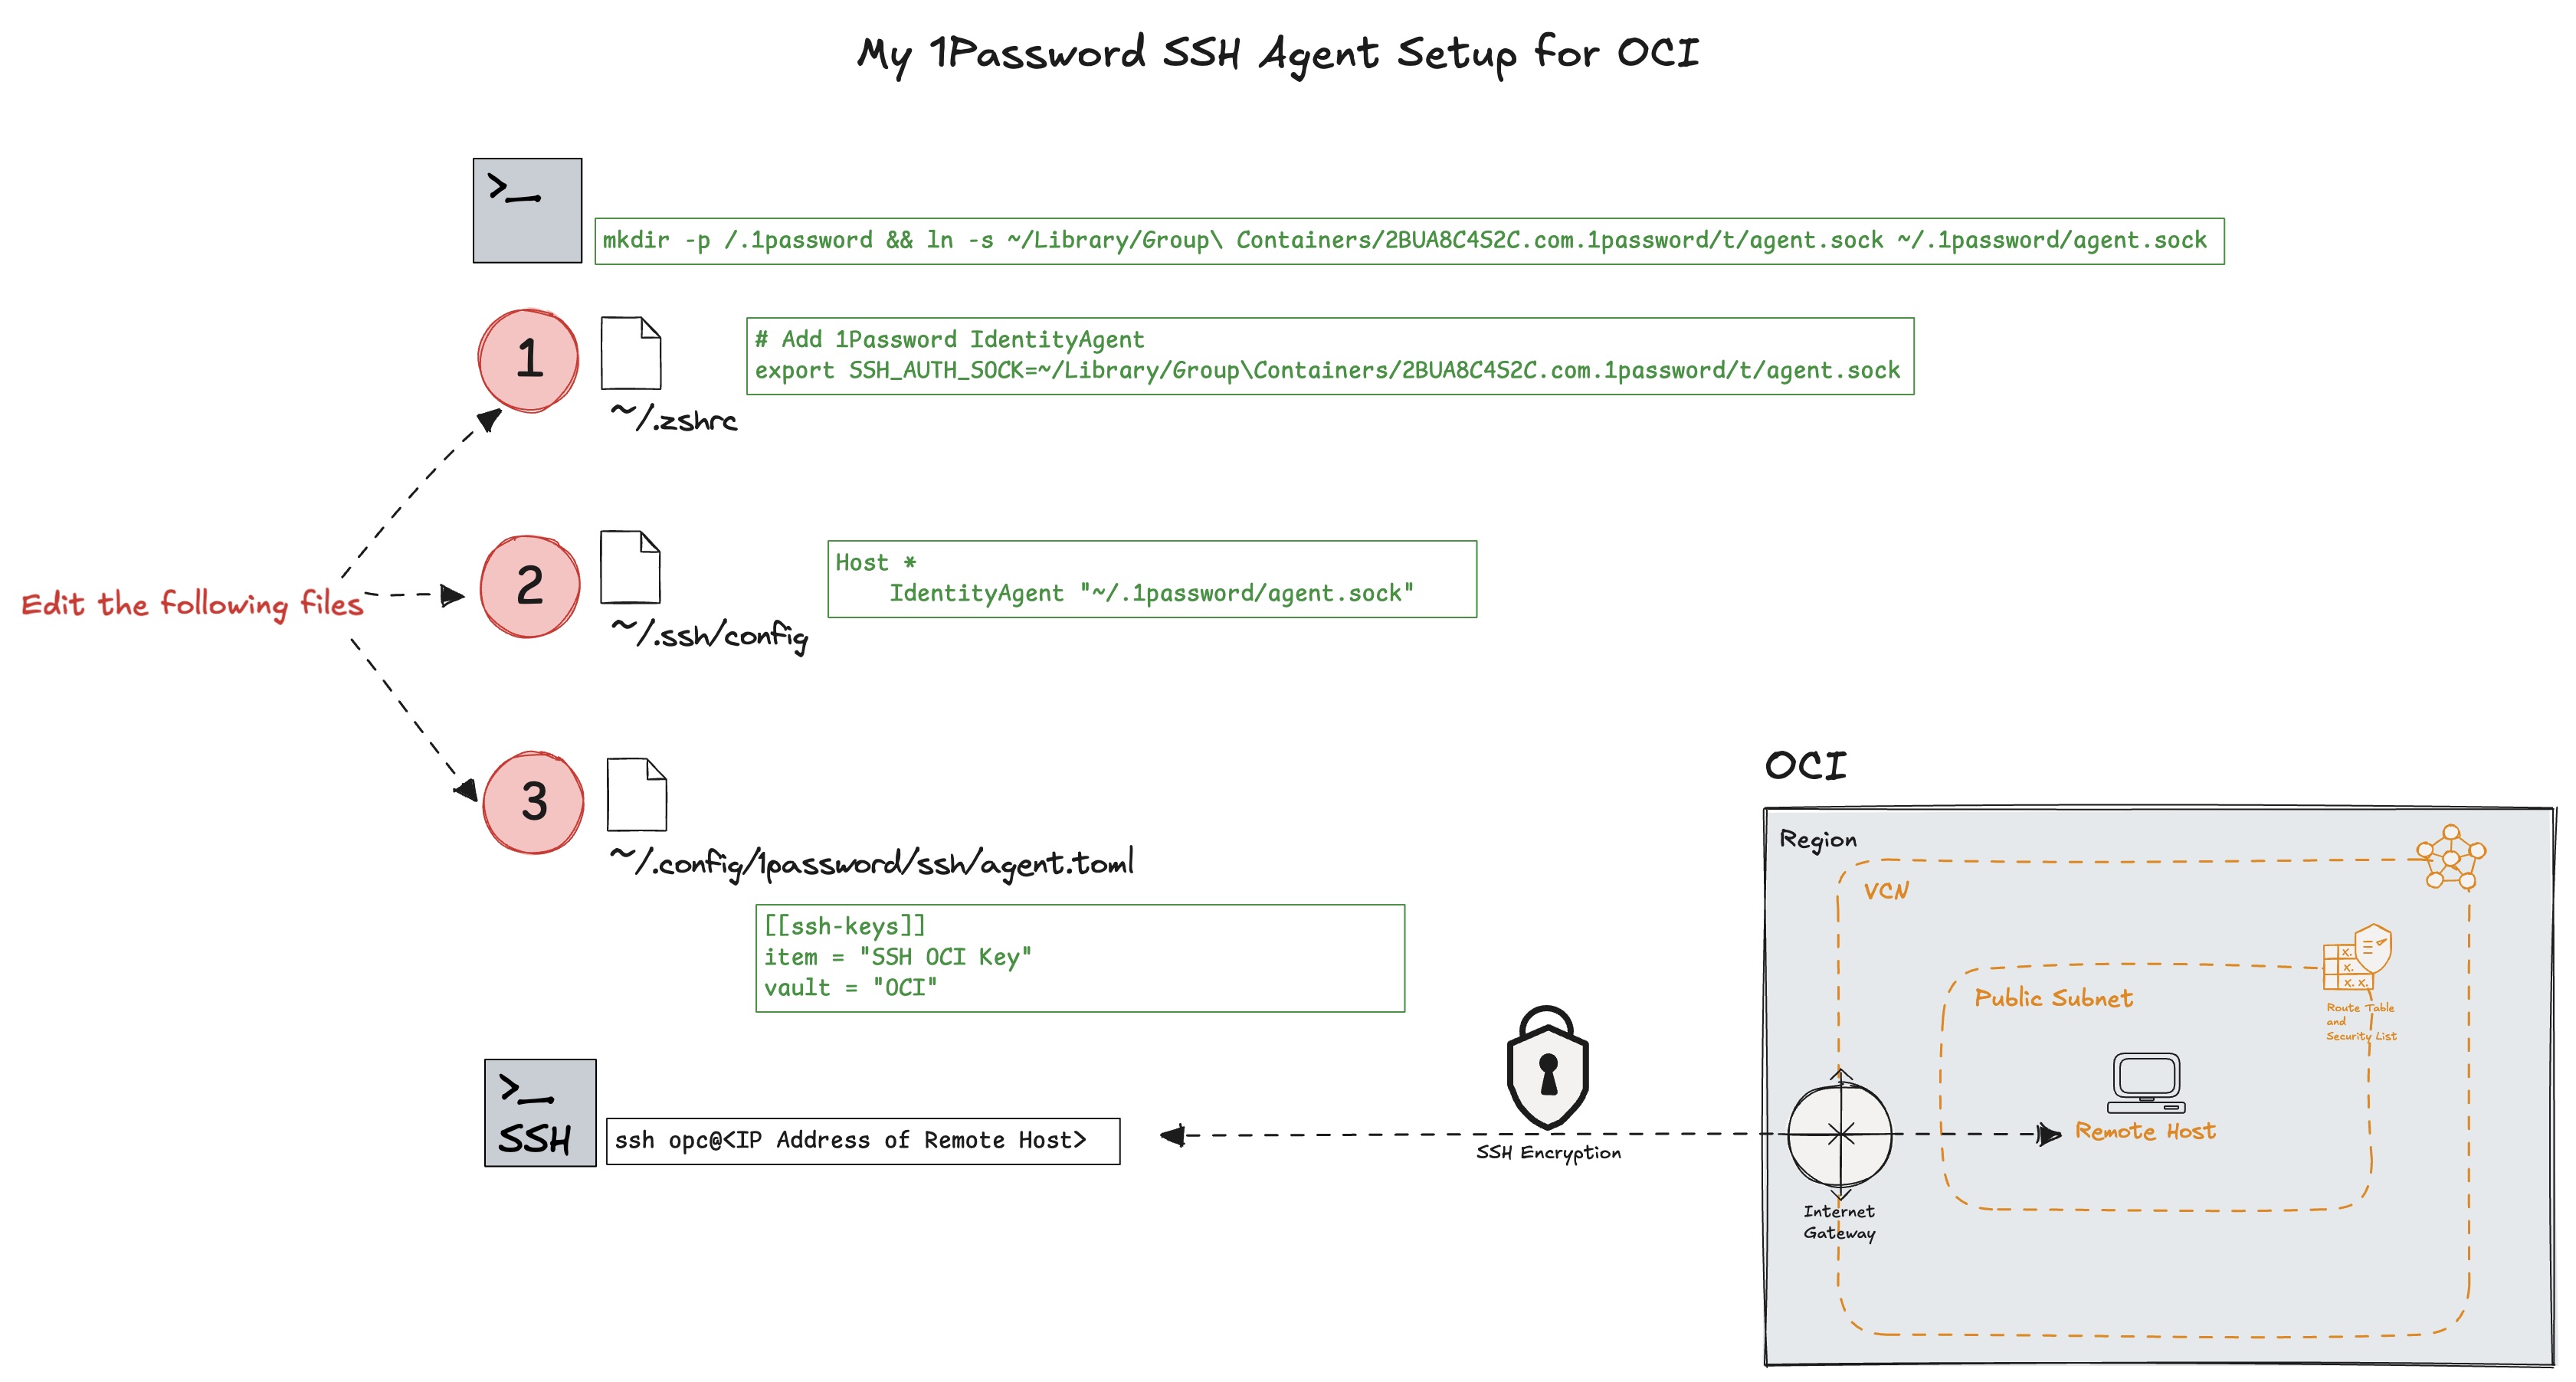
Diagram #1: 1Password workflow and files to edit
Let’s get started with the step-by-step configuration of your secure SSH workflow.
Setting Up 1Password SSH Agent for OCI
Prerequisites Before we begin, ensure you have:
- 1Password application installed on your machine
- NOTE: The 1Password desktop app includess the SSH agent. That needs to be turned on and running in the background to handle authentication for your SSH clients.
- A 1Password account configured
- Basic familiarity with terminal/command line
- Access to your OCI account
Step 1: Create SSH Keys in 1Password
- Open 1Password and navigate to your vault
- Click the “+” button to add a new item
- Select “SSH Key” from the available options
- Give your key a descriptive name like “SSH OCI Key”
- 1Password will generate a new SSH key pair for you
- Save the new SSH key item
Step 2: Configure Your Local Environment As shown in the diagram, we need to set up three key files to make this work:
- First, set up the SSH agent socket:
mkdir -p ~/.1password && ln -s ~/Library/Group\ Containers/2BUA8C4S2C.com.1password/t/agent.sock ~/.1password/agent.sock
This command creates the ~/.1password directory and creates a symbolic link to the 1Password SSH agent socket.
- Configure your shell to use the 1Password SSH agent:
Edit your
~/.zshrc(or~/.bashrcdepending on your shell) and add:
# Add 1Password IdentityAgent
export SSH_AUTH_SOCK=~/Library/Group\ Containers/2BUA8C4S2C.com.1password/t/agent.sock
This environment variable tells SSH to use 1Password’s agent instead of the system’s default SSH agent.
- Update your SSH config file:
Edit
~/.ssh/configand add:
Host *
    IdentityAgent "~/.1password/agent.sock"
This tells SSH to use the 1Password agent for all hosts by default.
- Configure your 1Password SSH agent settings:
Create or edit~/.config/1password/ssh/agent.toml with:
[[ssh-keys]]
item = "SSH OCI Key"
vault = "OCI"
This configuration tells 1Password which key to use when connecting to your OCI instances.
Step 3: Verify Your Setup
After completing these steps, you should verify that everything is working correctly:
ssh-add -l
This command should list your SSH key from 1Password if everything is configured correctly. In the next section, we’ll cover how to set up a new OCI compute instance with your 1Password SSH key for seamless access.
Setting Up OCI Compute Instances with 1Password SSH Keys
Now that we have 1Password’s SSH Agent configured on our local machine, let’s create a compute instance in OCI that uses our 1Password SSH key for authentication.
Step 1: Get Your Public SSH Key from 1Password
First, you need to obtain the public key portion of your SSH key stored in 1Password:
- Open 1Password and find your “SSH OCI Key” entry
- Click to view the item details
- Look for the “Public Key” section
- Click the copy button to copy the public key to your clipboard
Alternatively, you can retrieve your public key via the command line:
op item get "SSH OCI Key" --fields "public key"
Step 2: Create a New Compute Instance in OCI
- Log in to your OCI Console
- Navigate to Compute > Instances
- Click “Create Instance”
- Fill in the basic details for your instance:
- Name your instance
- Choose your compartment
- Select an image (I typically use Oracle Linux) and shape based on your requirements
Step 3: Configure the SSH Key for Your Instance In the “Add SSH keys” section of the instance creation form:
- Select “Paste public keys”
- Paste your copied 1Password SSH public key into the text field
NOTE: If you’re adding multiple keys, ensure each key is on a separate line
Step 4: Complete Instance Configuration Configure any additional options such as:
- VCN and subnet settings
- Boot volume size
- Advanced options if needed
Review your instance details Click “Create” to provision your instance
Step 5: Connect to Your OCI Instance Once your instance is up and running:
- Get the public IP address of your instance from the OCI Console
- Open your terminal and connect using the standard SSH command:
ssh opc@<IP Address of Remote Host>
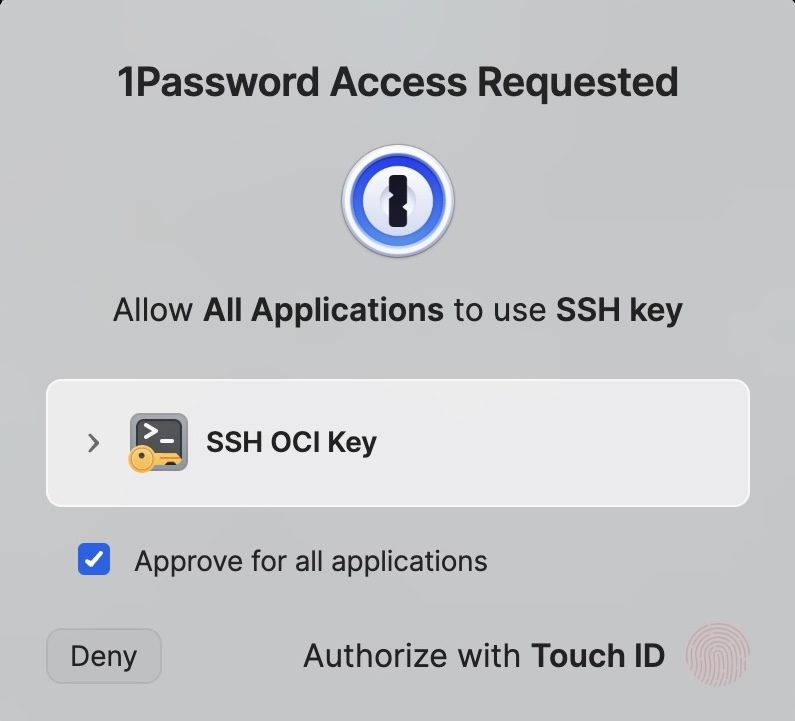
1Password’s SSH Agent will automatically handle the authentication without requiring you to specify a key file or enter a passphrase. You’ll be presented with a 1Password Access Request that authenticates with Touch ID:
If you’ve set up a different username for your instance (other than the default “opc”), use that instead:
ssh username@<IP Address of Remote Host>
Troubleshooting Connection Issues
If you encounter issues connecting to your instance:
- Verify your instance’s security list allows SSH traffic (port 22)
- Confirm the 1Password SSH Agent is running with
ssh-add -l - Check your SSH configuration with
ssh -v opc@<IP Address>for verbose output - Ensure your instance is in a “Running” state in the OCI Console